- Published on
CI/CD Made Easy: GitHub Actions, Docker Compose, and Watchtower
- Authors

- Name
- Avash Ghimire
- @in/avash-ghimire
Introduction
Continuous Integration and Continuous Deployment (CI/CD) pipelines are an essential part of streamlining software development workflows, ensuring top-notch code quality, and delivering updates with speed and accuracy. Docker has become a go-to tool for packaging software into containers that can be easily deployed across different environments, making it a ubiquitous aspect of CI/CD pipelines. Furthermore, there are various orchestration tools available, including Kubernetes, Docker Swarm, and Docker Compose. Among these, Docker Compose stands out as a more simpler and straightforward orchestration tool that enables users to manage Docker containers seamlessly.
Although tools like ArgoCD and FluxCD are available to continuously release newer versions of our application in Kubernetes and other similar tools for other engines, it appears that the Docker and Docker Compose ecosystem lacks such fancy tools. However, the introduction of watchtower has changed that.
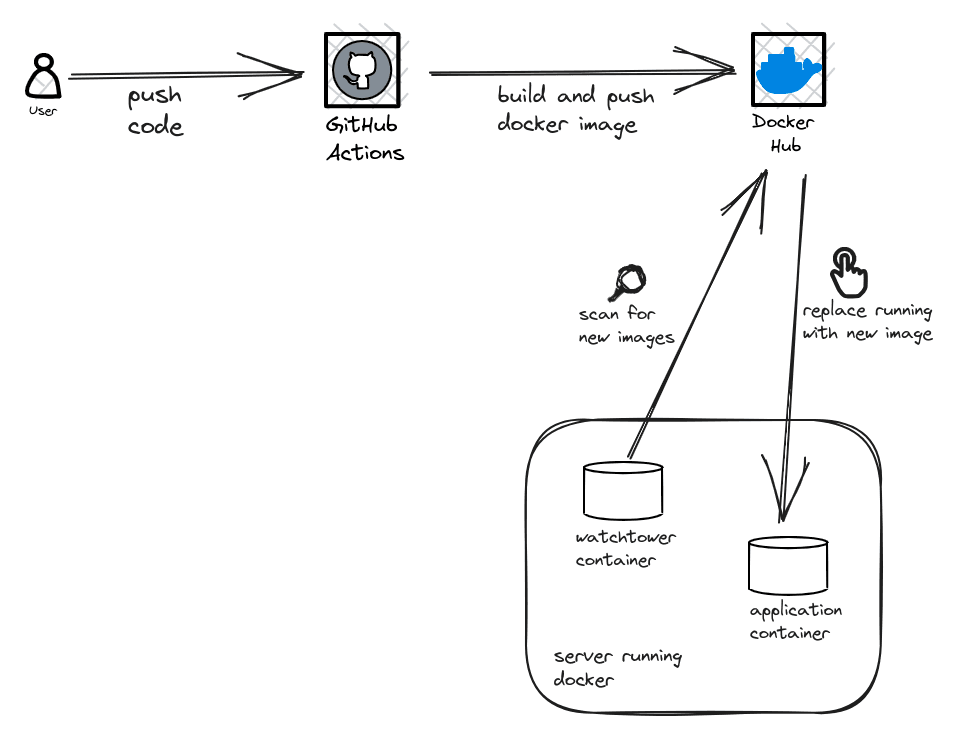
This article covers the use of Github Actions, Docker Compose, and Watchtower to create a simple and effective CI/CD tool. It's worth mentioning that although this solution may not be ideal for larger applications, it's still a highly effective method for rapidly setting up CI/CD pipelines for less complex applications or testing environments.
You can find the all the codes used in this article in this github repository.
Setting up docker hub
We will be dockerizing a simple express backend application and setting up a ci/cd pipeline for it. We will need a Github account and container registry to setup the first part i.e. CI part of our pipeline.
We will use docker hub as our container registry. You will need to have an account in docker hub. If you do not have an account, go ahead and create one here.
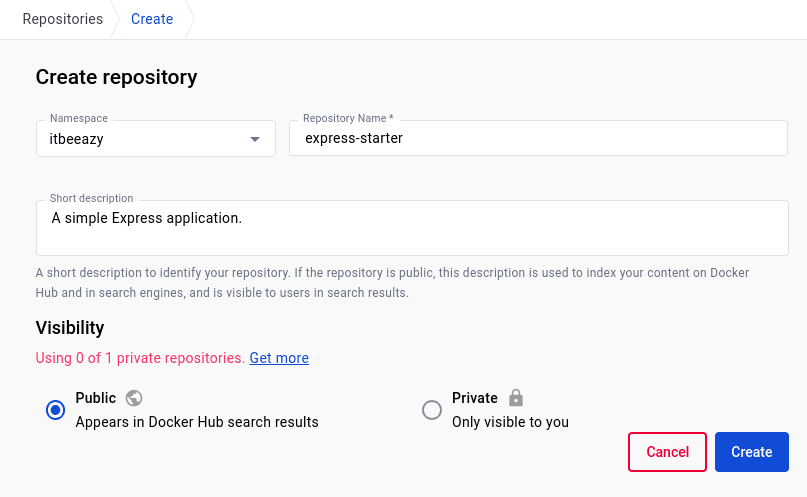
Now we need to create a docker hub repository to store our images. In the docker hub dashboard click on create repository button which you can find on the top right side below the navigation bar.
You can give it any name your want. I will name mine, express-starter and keep it's visibility as public. You may change it to private according to your requirement and then click on create.
We will also need access token to be able to push our docker images from github actions. To generate an access token head over to Accout Settings > Security > New Access Token. Give it a description of your choice and click on Generate. Store the token safely as we will be using it later in our pipeline.
Setting up github and github actions
We will be dockerizing the express application from the repository mentioned above. You may clone the repository and use the codebase available there or you may use your own codebase and Dockerfile.
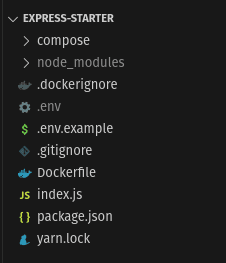
As we can see, we have a Dockerfile in our root directory with which we can build our docker image.
FROM node:18.17.0-alpine3.18
WORKDIR /src
COPY package.json .
COPY yarn.lock .
RUN yarn install
COPY . .
CMD ["npm", "start"]
The Dockerfile is a very simple one. We are taking a Node.js base image and running our start script after installing and copying required project dependencies.
Let's add a Github Actions workflow in our project directory. Create a directory named .github and inside that directory create another directory named workflows. All our workflow files will be stored inside this directory. Create a file named publish.yml which will make the complete path as .github/workflows/publish.yml.
Inside publish.yml, paste the code below:
name: pipeline
on:
  push:
    branches:
      - 'your-branch-to-build-from'

jobs:
  deploy:
    name: build && push image to docker hub
    runs-on: ubuntu-latest

    steps:
      - uses: actions/checkout@v3
        with:
          ref: 'same-as-branch-mentioned-above'

      - name: setup docker buildx
        uses: docker/setup-buildx-action@v2

      - name: docker login
        uses: docker/login-action@v2
        with:
          username: ${{ secrets.DOCKERHUB_USERNAME }}
          password: ${{ secrets.DOCKERHUB_TOKEN }}

      - name: build and push api
        id: build-push-api
        uses: docker/build-push-action@v3
        with:
          context: .
          file: Dockerfile
          push: true
          tags: <your-dockerhub-username>/<your-dockerhub-repo>:<image-tag>
Modify the above YML file with your required values for branch, docker hub information and image tag. Use your docker hub username and dockerhub repository name created earlier. Here's a version of mine.
name: pipeline
on:
  push:
    branches:
      - 'deploy'

jobs:
  deploy:
    name: build && push image to docker hub
    runs-on: ubuntu-latest

    steps:
      - uses: actions/checkout@v3
        with:
          ref: deploy

      - name: setup docker buildx
        uses: docker/setup-buildx-action@v2

      - name: docker login
        uses: docker/login-action@v2
        with:
          username: ${{ secrets.DOCKERHUB_USERNAME }}
          password: ${{ secrets.DOCKERHUB_TOKEN }}

      - name: build and push api
        id: build-push-api
        uses: docker/build-push-action@v3
        with:
          context: .
          file: Dockerfile
          push: true
          tags: itbeeazy/express-starter:latest
Now, whenever I push to deploy branch, a new build will be triggered which will build and push the image to docker hub. The workflow is pretty simple and you may also extend it with running tests or performing other actions as per your requirements.
You may have noticed we have used ${{ secrets.DOCKERHUB_USERNAME }} and ${{ secrets.DOCKERHUB_TOKEN }} in our workflow. Those are the docker hub credential stored in Github Secrets. We cannot publicly expose them because they grant access to our docker hub account.
Head over to Github Secrets page from Settings > Secrets and variables > Actions and click on New repository secret. Enter your docker hub username as shown below:
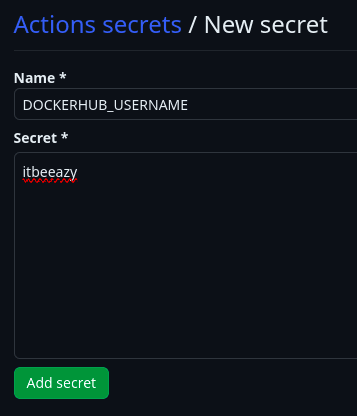
Similarly, create another secret to store docker hub access token that we created in the earlier step.

Our workflow is now ready. Let's test it by pushing something to the deploy branch. If you are using some other branch, push to the associated branch accordingly.
In some cases, GitHub Actions maybe disabled by default. Go to Settings > Actions > General and make sure Allow all actions and reusable workflows is chosen.
Testing github actions workflow
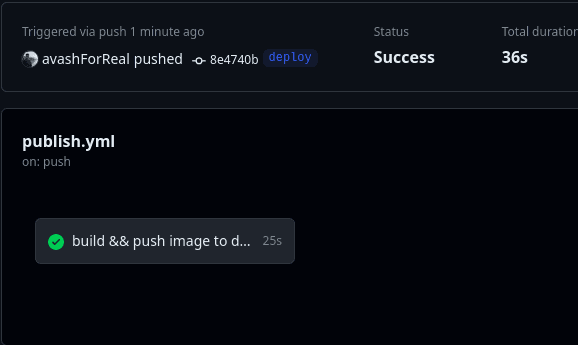
After pushing a commit to our repository, we can see that our workflow has ran successfully.
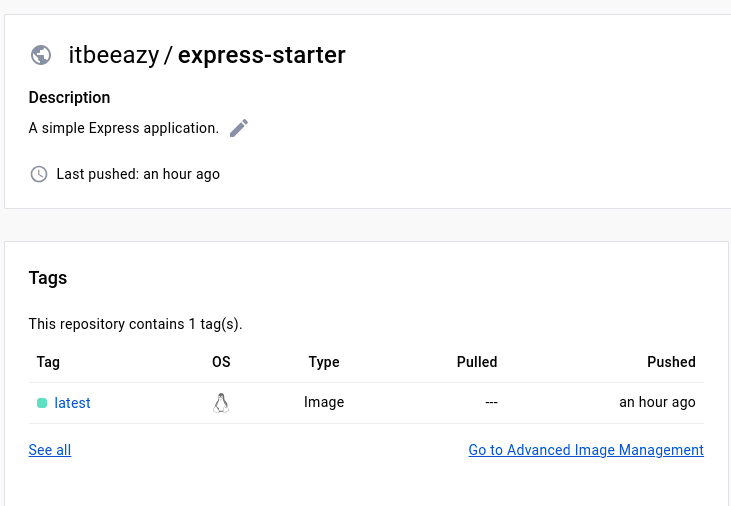
To confirm that our docker image has been built and pushed to registry, let's head over to docker hub. We can see that our image has been pushed with the latest tag.
This wraps up the first part of our pipeline. Now will look into how we can automatically pull the image from docker hub whenever new iamge gets push in the repository
Running our docker image with docker Compose
Lets take a look at the docker compose file below.
version: '3.8'
services:
  express_starter:
    container_name: express_starter
    image: itbeeazy/express-starter:latest
    restart: always
    environment:
      - PORT=3030
    expose:
      - 3030
    ports:
      - 3030:3030
    networks:
      - express_nw
networks:
  express_nw:
    driver: bridge
Here, we are running the image that we pushed earlier to docker hub. I am using the repo name and the tag from the above steps. You may change the image/container names and other fields like ports and other values accordingly.
Head over to your terminal and run the compose file with the following command:
docker compose up -d
Note: If you are using a private repository, you need to authenticate your docker hub account in the host/server where you are running the container. Read more in this thread.
This will run the container in the background. If check if the container is running or not you may run the following command:
docker ps
To view the logs of the running container run:
docker logs <container id>/<container name>
Example:
docker logs express_starter
Output:
> express-starter@1.0.0 start
> node index.js

App listening on port 3030

> express-starter@1.0.0 start
> node index.js

App listening on port 3030
We can see that our container is running successfully. In the next step we will see how we can automatically pull and run updated images from docker hub.
Update the running image
We will be using a tool called watchtower to update our running containers. Add following line of code to our docker compose.
watchtower:
  container_name: watchtower
  image: containrrr/watchtower
  environment:
    - WATCHTOWER_CLEANUP=true
  volumes:
    - /var/run/docker.sock:/var/run/docker.sock
  command: --interval 30 <your-container-name>
Here, we are pulling the watchtower image and running it in our machine. You can specify as many container names you want separated by a space in the command key. This watchtower container will scan the repository of specified container names every 30 seconds pull and replace the running container with a new image if it finds one.
The WATCHTOWER_CLEANUP environment variables ensures that the unused images will be automatically removed by watchtower, hence freeing up our storage space.
So our final docker compose file will be as follows:
version: '3.8'
services:
  express_starter:
    container_name: express_starter
    image: itbeeazy/express-starter:latest
    restart: always
    environment:
      - PORT=3030
    expose:
      - 3030
    ports:
      - 3030:3030
    networks:
      - express_nw

watchtower:
  container_name: watchtower
  image: containrrr/watchtower
  environment:
    - WATCHTOWER_CLEANUP=true
  volumes:
    - /var/run/docker.sock:/var/run/docker.sock
  command: --interval 30 express_starter

networks:
  express_nw:
    driver: bridge
Now, run the command as above to run the compose file.
docker compose up -d
Output:
[+] Running 4/4
 ✔ watchtower 3 layers [⣿⣿⣿]      0B/0B      Pulled                           8.7s
   ✔ 7e1f4ce8770d Pull complete                                               1.5s
   ✔ cc408d374d64 Pull complete                                               1.6s
   ✔ 4412f0a27731 Pull complete
 ✔ Network compose_default    Created                                         0.1s
 ✔ Container watchtower       Started                                         0.1s
 ✔ Container express_starter  Running
If we run docker ps we can see that the watchtower container is running.
Run the command below to view the logs of watchtower container:
docker logs watchtower
Output:
time="2023-09-11T08:44:07Z" level=info msg="Watchtower 1.5.3"
time="2023-09-11T08:44:07Z" level=info msg="Using no notifications"
time="2023-09-11T08:44:07Z" level=info msg="Only checking containers which name matches \"express_starter\""
time="2023-09-11T08:44:07Z" level=info msg="Scheduling first run: 2023-09-11 08:44:37 +0000 UTC"
time="2023-09-11T08:44:07Z" level=info msg="Note that the first check will be performed in 29 seconds"
time="2023-09-11T08:44:40Z" level=info msg="Session done" Failed=0 Scanned=1 Updated=0 notify=no
time="2023-09-11T08:45:10Z" level=info msg="Session done" Failed=0 Scanned=1 Updated=0 notify=no
time="2023-09-11T08:45:40Z" level=info msg="Session done" Failed=0 Scanned=1 Updated=0 notify=no
time="2023-09-11T08:46:10Z" level=info msg="Session done" Failed=0 Scanned=1 Updated=0 notify=no
We can see from the logs that watchtower has started scanning our repository for new images.
In cases of private repositories, watchtower will need additional configuration to scan repo for new images. Refer to this documentation for more details
Let's update something in the deploy branch of our github repository and see watchtower update our image in real time. I will add a /ping route in our express app.
app.get('/ping', (req, res) => {
  res.send('pong!')
})
We can see that our github workflow ran successfully and pushed image to the docker hub.
From the watchtower logs, we can see that new image was pulled from docker hub and updated as well.

If we make a curl request to the new ping route, we will get the updated response.
curl <your-host-address>:3030/ping
Output:
pong!
Conclusion
In conclusion, by following the step-by-step guide presented in this article, you've unlocked the potential to transform your software deployment process. The integration of GitHub Actions, Docker Compose, and Watchtower offers a powerful, automated, and efficient CI/CD pipeline. Embracing these tools allows you to focus more on coding and less on deployment intricacies. Happy coding and deploying!
The final project with workflow files and docker compose file can be found in
deploybranch of this repository.